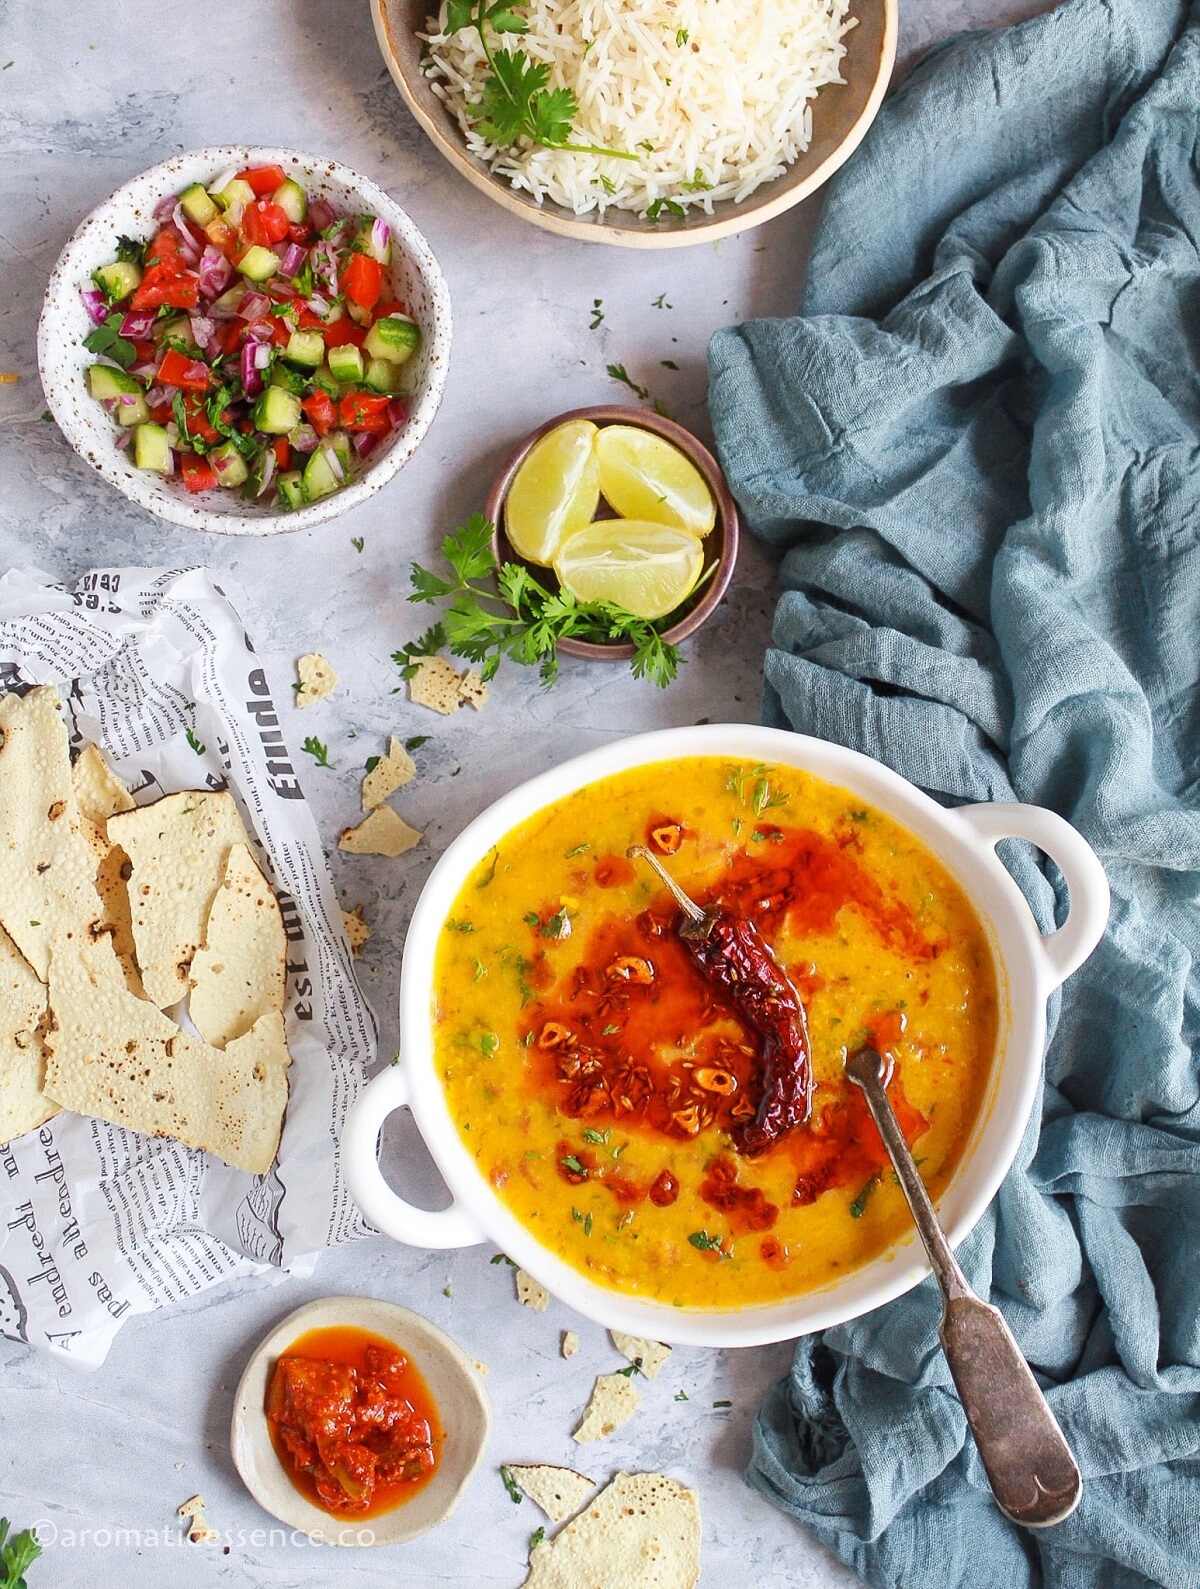
This creamy and comforting toor dal is one of the simplest and basic Indian lentil recipes made on a daily basis in most Indian households. It is nutritious, wholesome, really easy to prepare, and kid-friendly. The best part is that it comes together pretty quickly.
Dal-rice pairing is the epitome of Indian comfort food. It is the most sought-after meal after gorging on festive indulgences. Given that we are at the end of January, it has definitely been a while since most of us may have indulged in any fattening food.
Nonetheless, I’d really love to share this toor dal recipe with you guys. It is one of the most basic recipes that you ought to know like the back of your hand. Dal and rice is the kind of meal I lean on in times when I am unsure of what to prepare, or I’m looking for something simple that can be whipped up quickly.
Then a quick veggie-stir fry or omelet, kachumber (onion-tomato-cucumber salad), pickle, and papad are paired alongside to make it a wholesome meal.
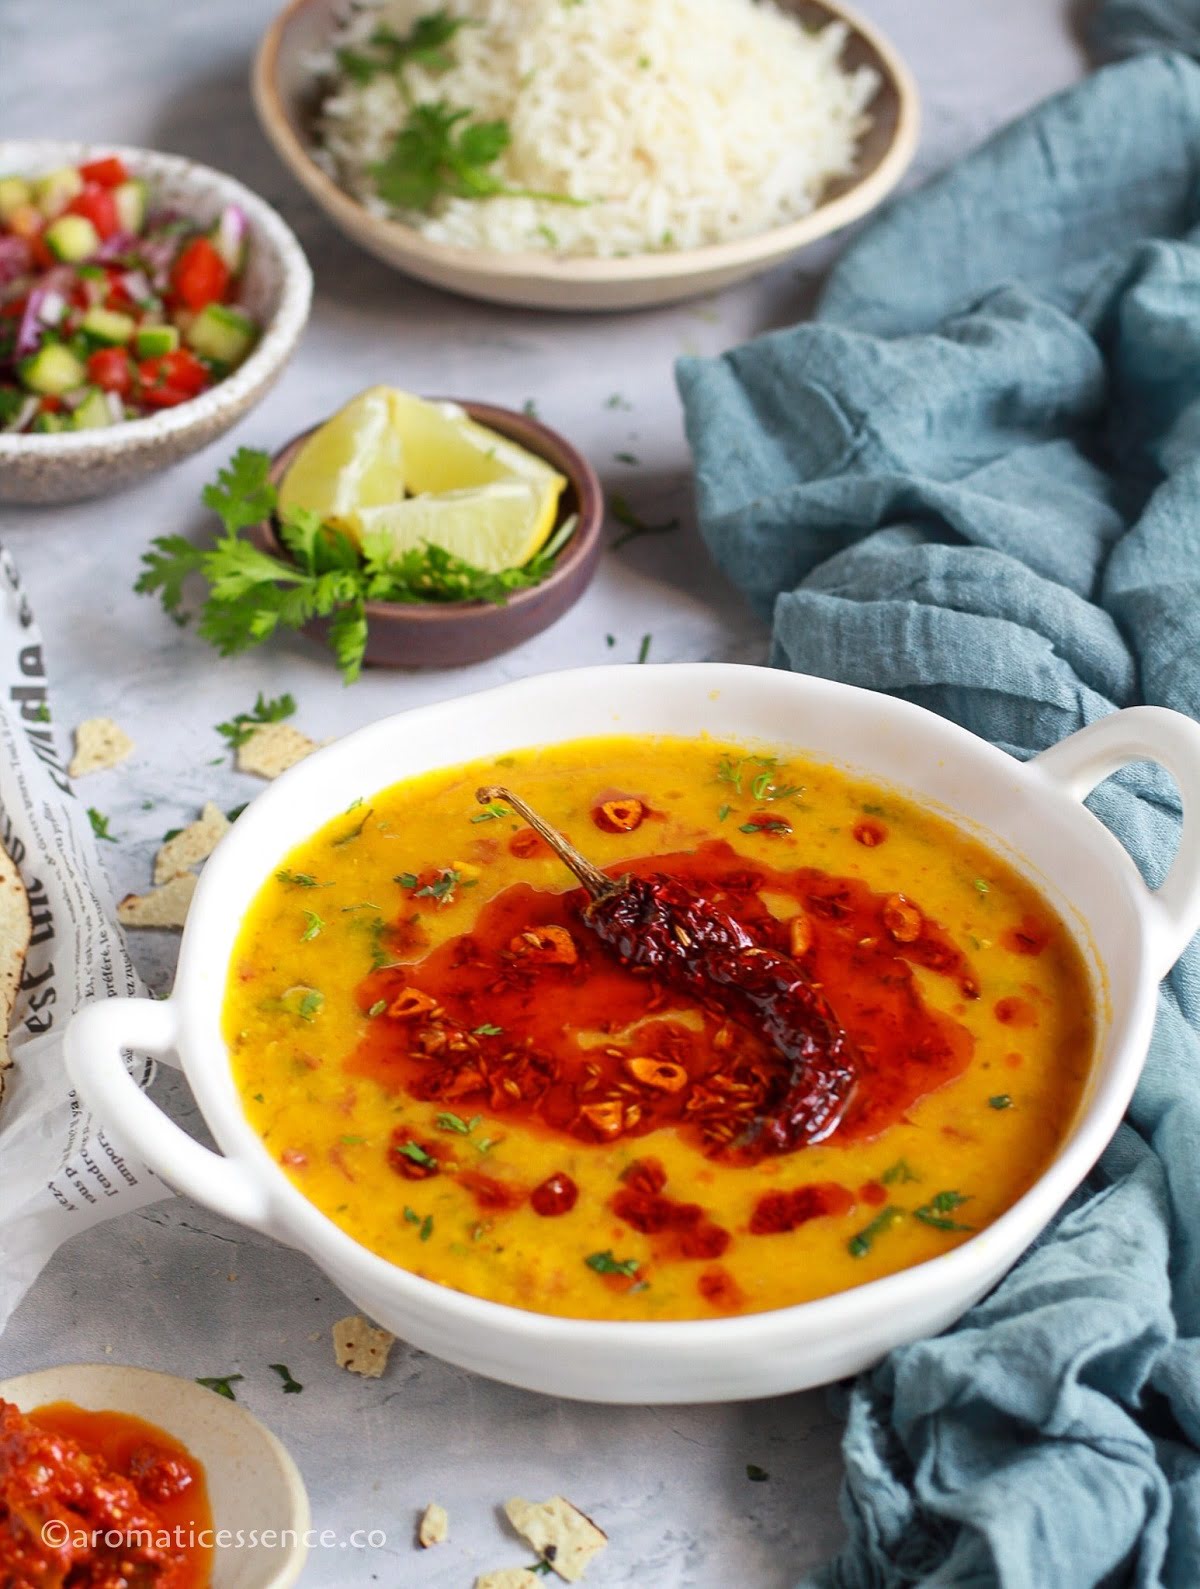
Table of Contents
What is dal?
Dal is used as a generic term for two things;
- For dried split pulses, lentils, beans, and peas.
- For dishes like soups, curries, or stews made with the above. It is also referred to as dal, dhal, dahl, or daal.
You can make dal with one type or a combination of lentils. Dal is made practically every day in most Indian homes. The method of preparation differs regionally. So does the taste and consistency! But trust me, no matter which version you pick, you will enjoy a bowl of dal any time of the day, month, or year!
Very often a tadka is added over the prepared dal. Tadka, also known as tarka, baghar, or vaghar is nothing but a technique that involves frying whole and powdered spices in ghee/oil to release their flavors. This adds another layer of flavor to the already delicious dal.
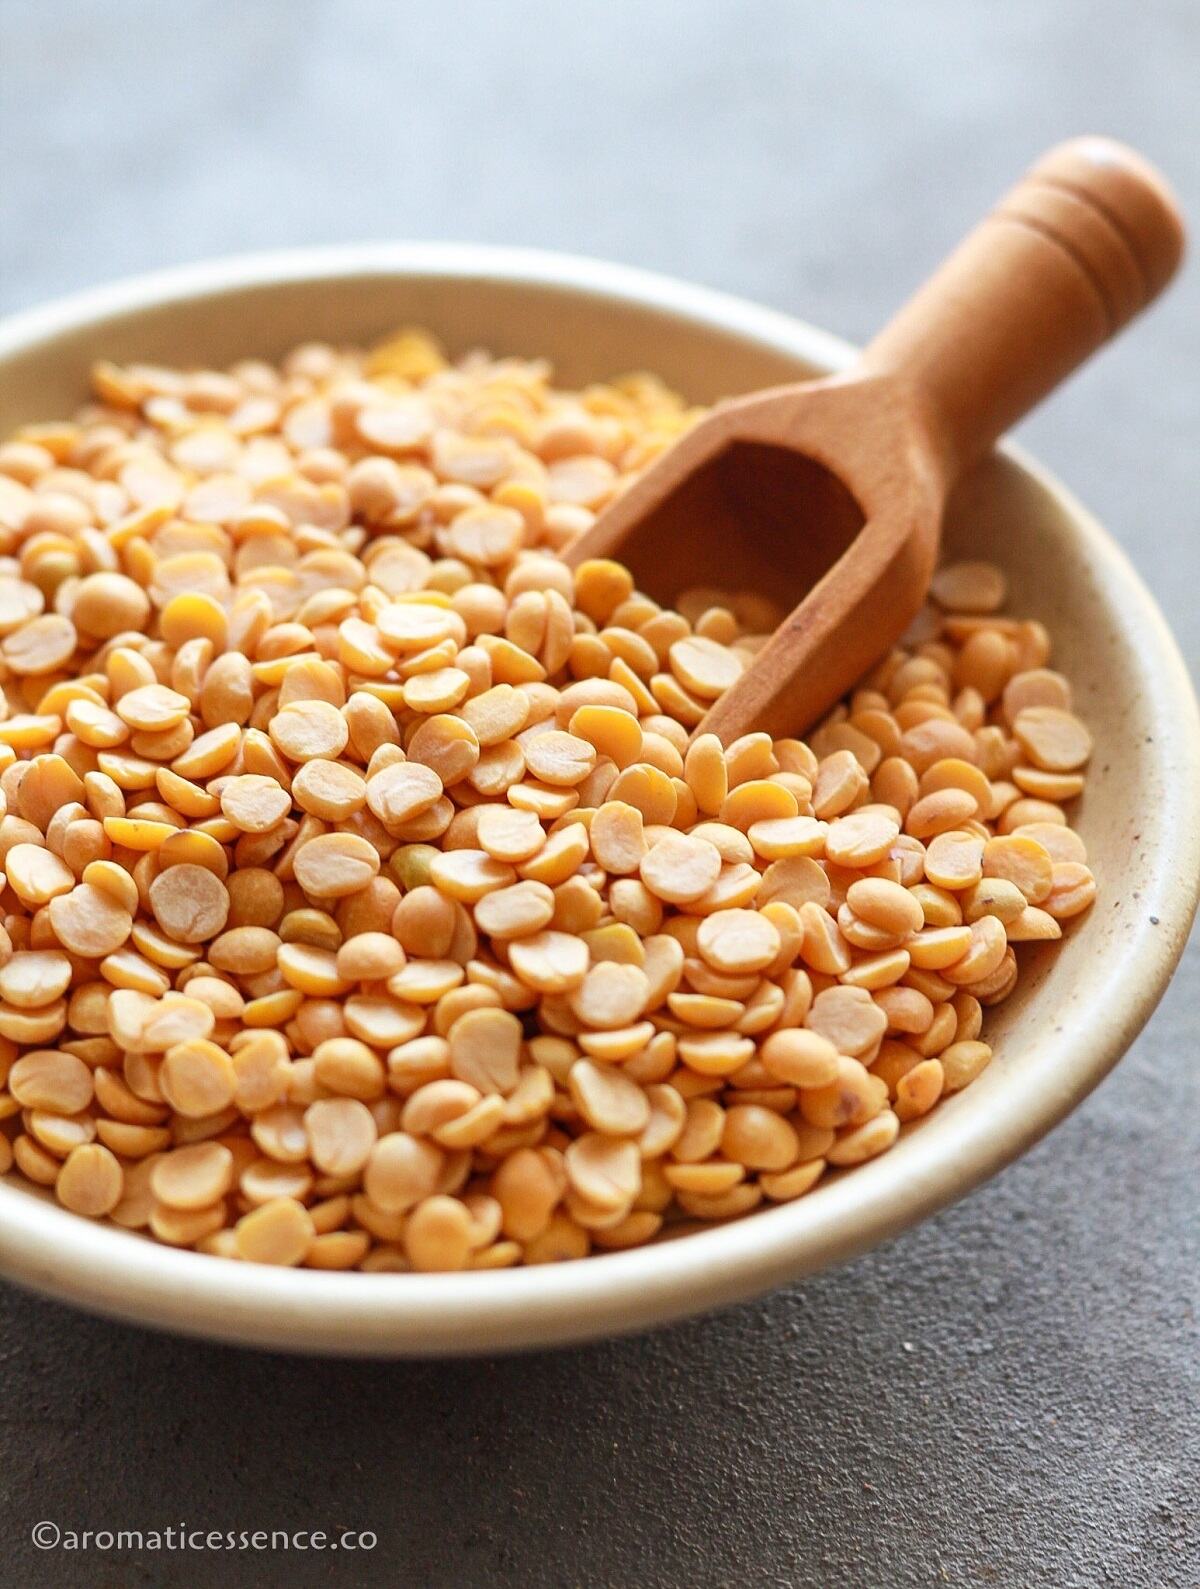
What is toor dal?
Split pigeon peas or yellow lentils are called toor dal in ‘Hindi’. It is also known as arhar dal, tuvar dal, tuar dal, tuwar dal, tur dal, toovar dal, or peeli (yellow) dal.
There are two ways in which you can make this toor dal recipe;
- Pressure cook the dal separately in water, salt, turmeric, and then add it to the 1st tempering i.e spiced onion-tomato masala (prepared separately in another pan).
- Cook the dal along with the onion tomato masala in the pressure cooker. This method makes it a one-pot dal recipe.
I’ll show you both the ways in this post. The first way is shown in the stovetop pressure cooker. And the second method uses the handy Instant Pot.
Of course, feel free to use your preferred method and equipment to make this yummy toor dal recipe.
Why you will enjoy this recipe?
☑ Toor dal is high in proteins and fibers making it a very healthy choice
☑ Simple yet delicious
☑ Can be adapted to make it vegan & gluten-free
☑ Really easy to prepare
☑ Can be made-ahead
☑ Can be paired with plain steamed rice and any veggie stir-fry of choice for a wholesome meal
☑ Very adaptable to suit your tastebuds, be sure to check variations below
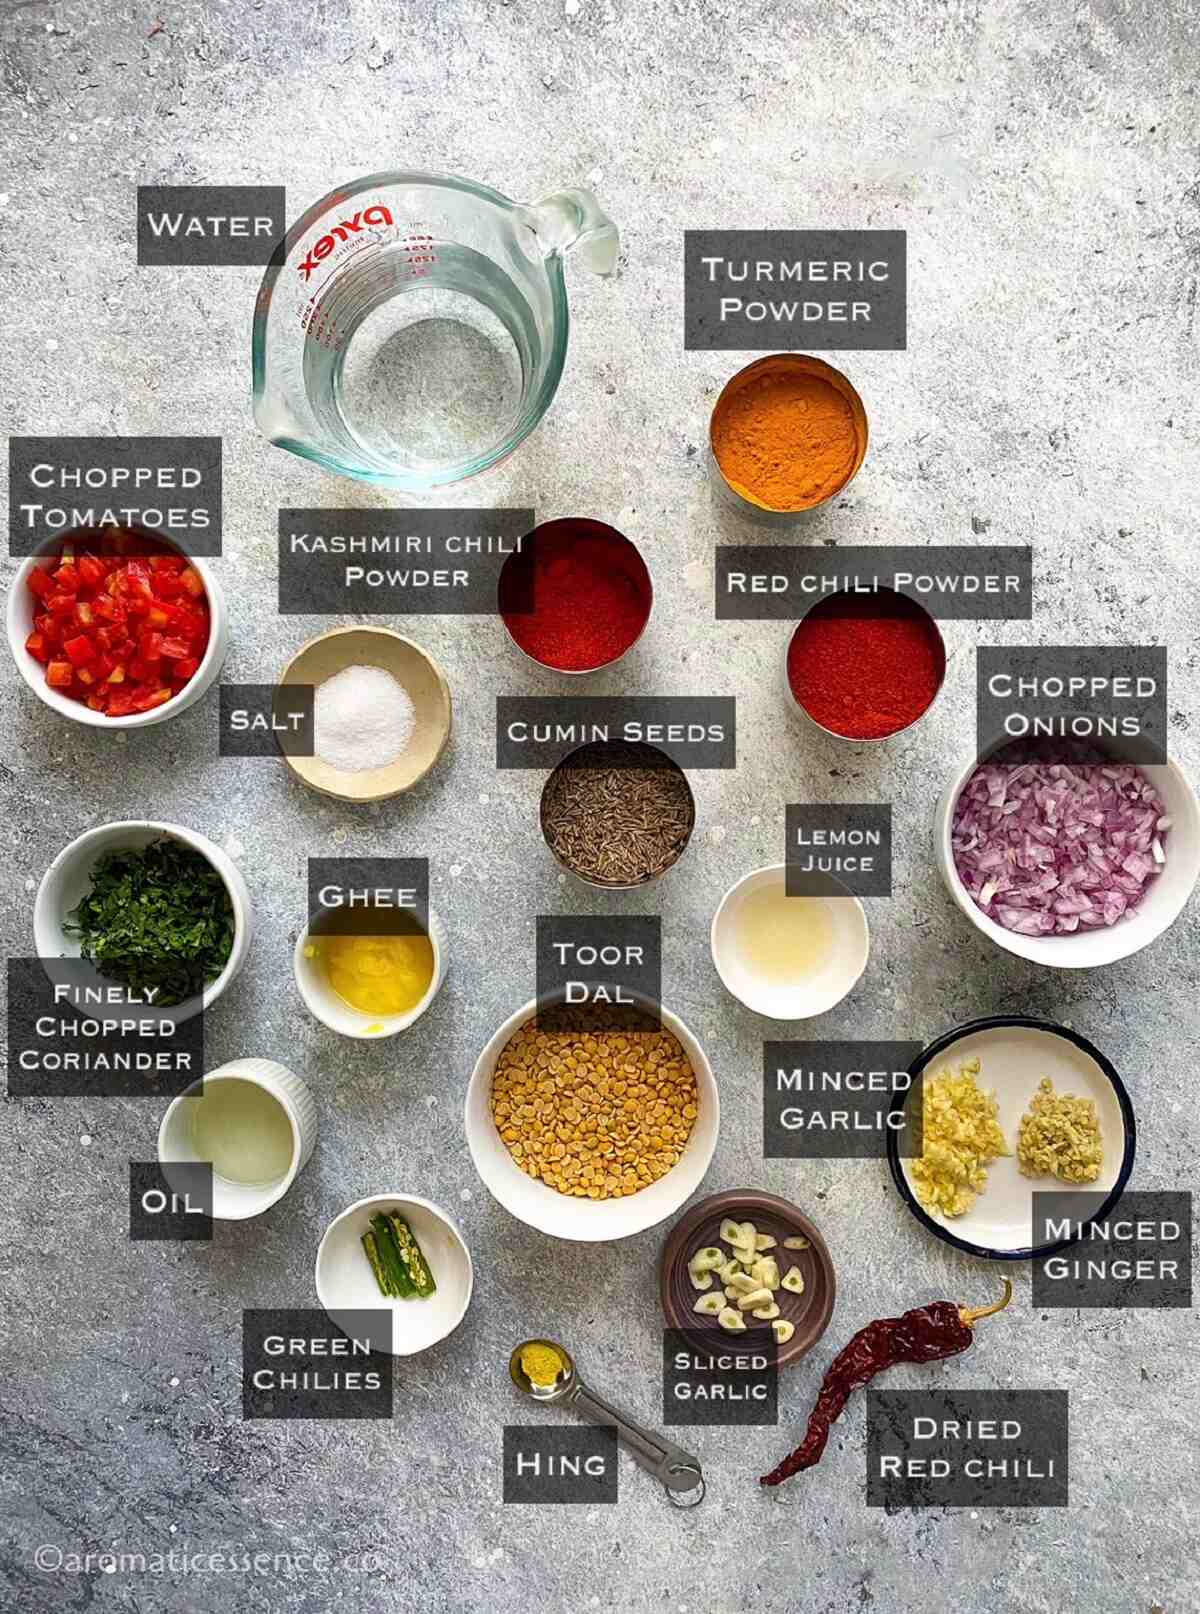
Arhar dal ingredients
As I mentioned, there are many ways of preparing this toor dal recipe. I’m sharing the North Indian version, Punjabi version to be specific. I am sure that this is not the only version that’s made in Punjab, I’m just sharing my take on it 🙂
Toor dal: Since this recipe is all about toor dal, that is what I’ve used. I’ve used 24 Mantra’s organic tur dal. You can use a mix of toor dal, masoor dal, and moong dal. Totally up to you!
Aromatics: These are the usual suspects, i.e ginger, garlic, and finely diced onions. They add a delicious layer of flavor to this humble dal. You can skip the garlic and onions for a Jain version without altering the recipe. It still turns out just as delicious!
Chilies: I’ve used fresh green chilies in the first tempering and dried red chilies in the second tempering.
Tomatoes: Adds some acidity to the otherwise creamy dal.
Regular Indian spices: Whole and ground spices such as cumin seeds, ground turmeric, red chili powder, Kashmiri red chili powder which are the usual spices found in a typical Indian spice box. Along with these spices, you will also need salt.
Hing: Known as asafoetida in English, is added in small quantities in the preparation of lentils, legumes, and beans in Indian homes. It aids in digestion and adds an umami flavor.
Lemon juice: Adds a slight tang that lifts the flavor of the dal. It is optional but recommended.
Fresh herbs: Lots of freshly chopped coriander leaves, add a fresh element and aroma to the creamy dal.
How to make toor dal recipe – Step by step process
Stovetop Instructions
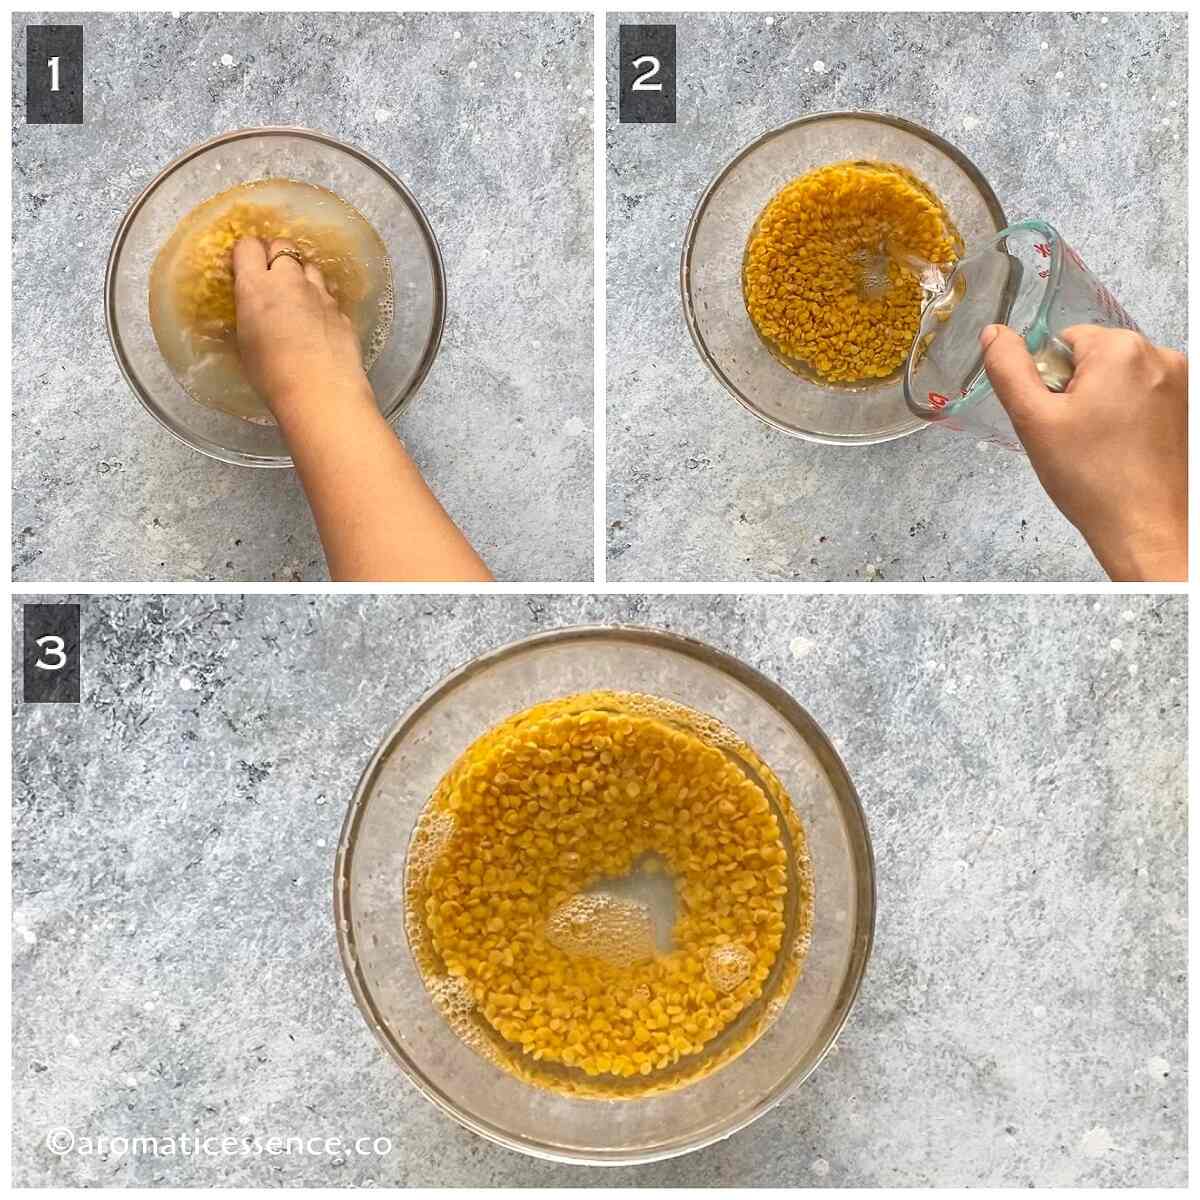
Step 1: Rinse and soak the toor dal
Rinse the toor dal well under running water until the water runs clear, then soak in about 2 cups of water for about 30 minutes. (Photos 1 to 3)
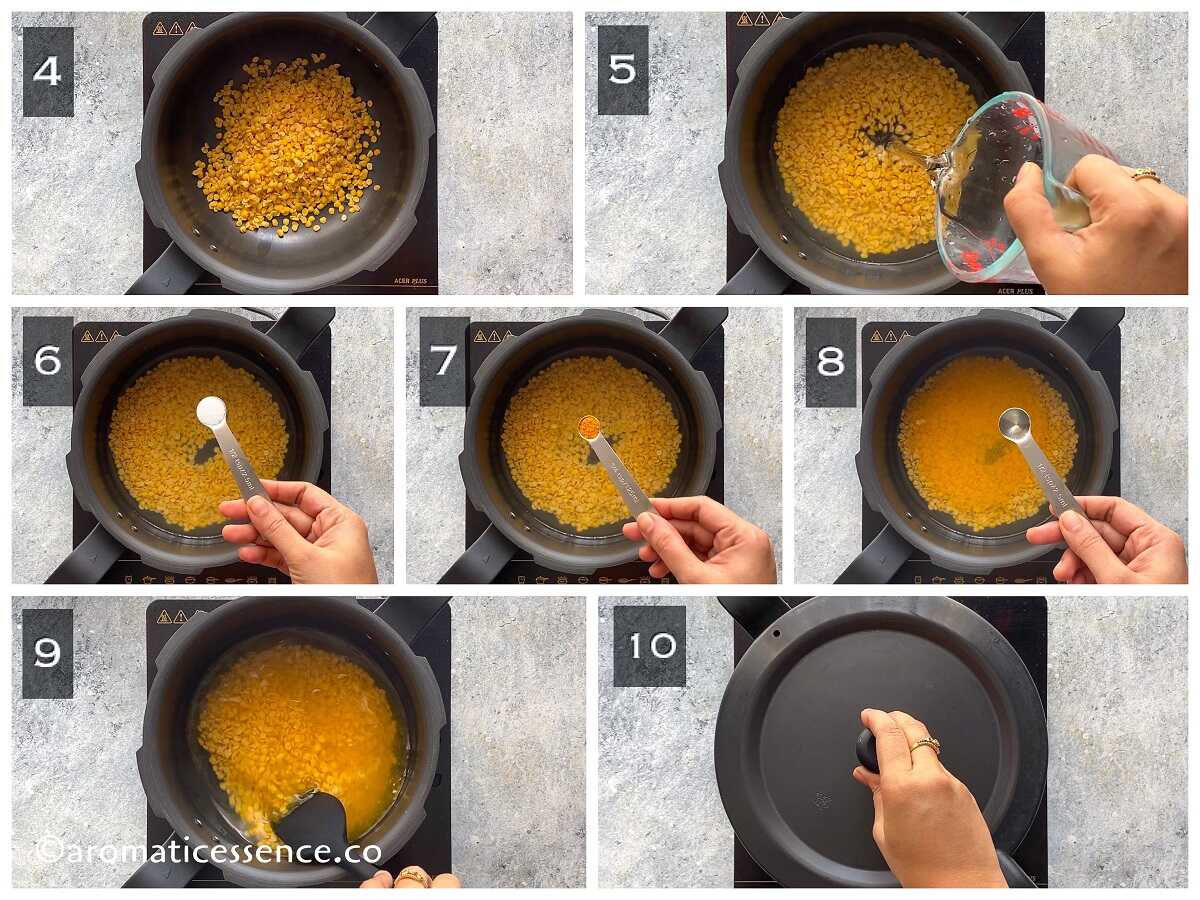
Step 2: Pressure cook the dal
Transfer the drained dal to a pressure cooker. Add 1 & 1/2 cups of water along with 1/2 teaspoon salt, 1/4 teaspoon turmeric, and 1/2 teaspoon oil.
Adding oil prevents frothing and spilling from the pressure cooker.
Pressure cook the dal, for 3 whistles on high heat, then lower the heat and simmer for another 5 minutes. Switch off the heat and set the cooker aside. (Photos 4 to 11)
Once the cooker depressurizes, open the lid and whisk the dal using a wired whisk or a spatula until it is smooth. You may leave it as it is if you prefer it that way. (Photos 12 to 14)

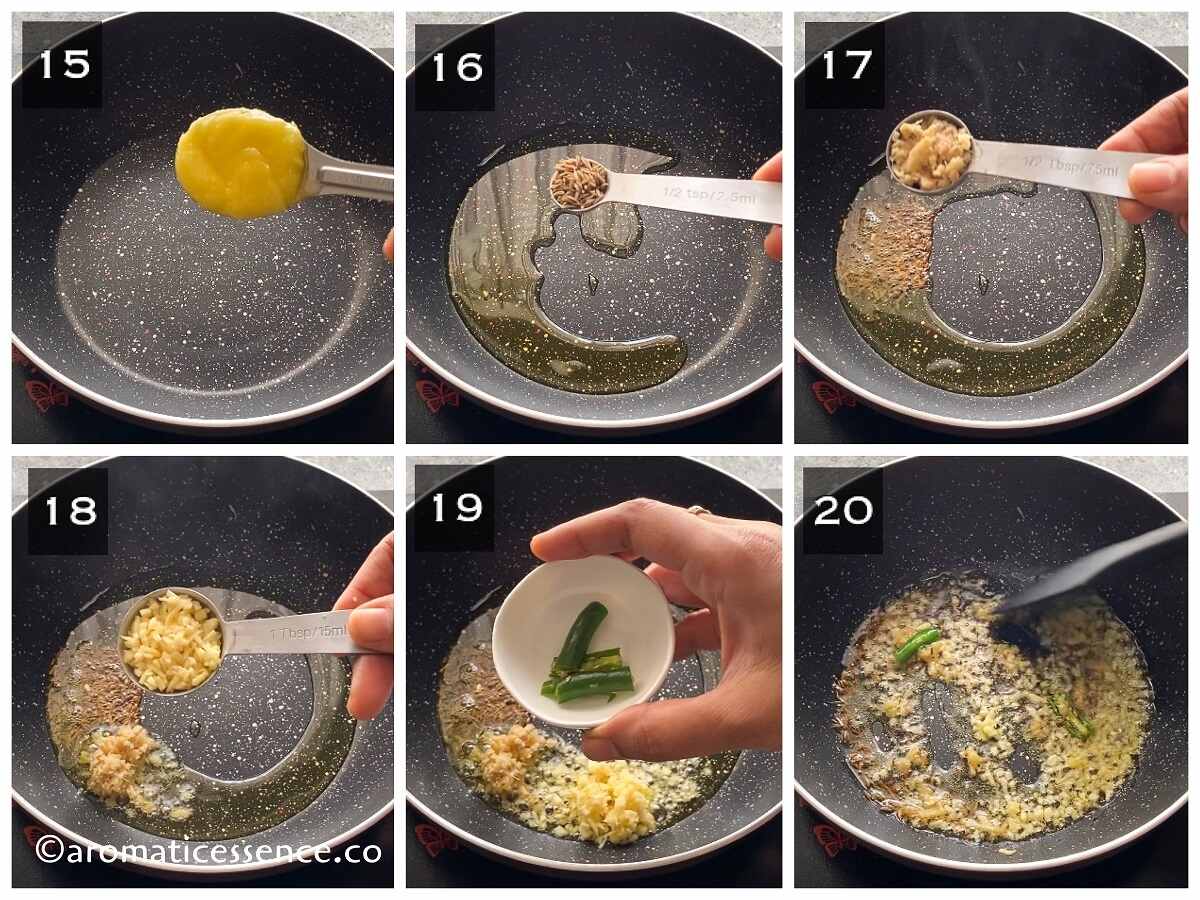
Step 3: First tempering
Heat 1 tablespoon ghee in a heavy-bottomed Kadai or pot. (Photo 15)
Once hot enough, add 1/2 teaspoon cumin seeds. Wait for the cumin seeds to crackle then add 1/2 tablespoon minced ginger, 1 tablespoon minced garlic, and 2 slit green chilies.
Saute until ginger, garlic turn aromatic. (Photos 16 to 20)
Add 1/2 cup finely chopped onions, sauté until it turns golden brown. (Photos 21 and 22)
Next, add 1/2 cup chopped tomatoes and 1/4 teaspoon salt, sauté until it turns mushy. (Photos 23 to 26)
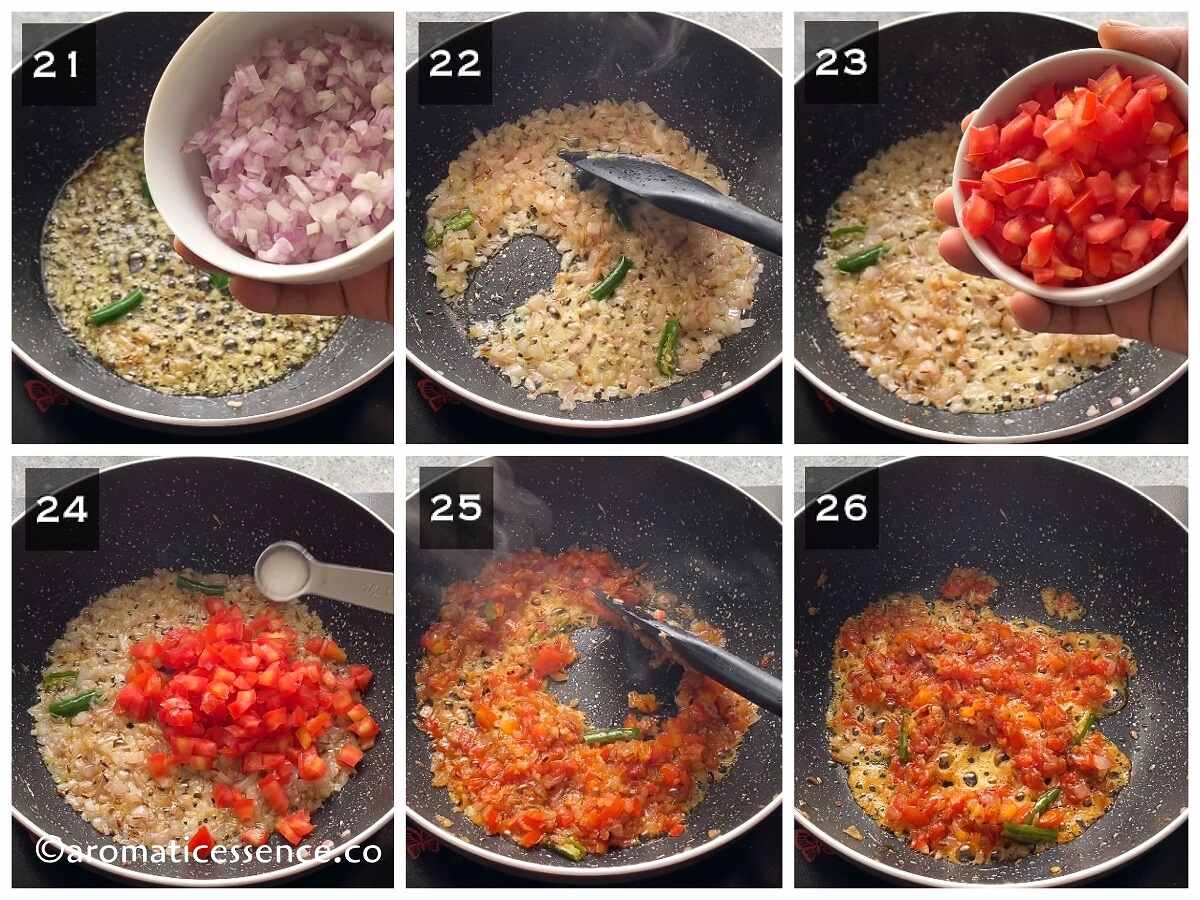
Add 1/4 teaspoon turmeric and 1/2 teaspoon red chilli powder, sauté for another 30 seconds. (Photos 27 to 29)

Step 4: Add the cooked dal to the first tempering
Next, add the cooked dal to the prepared tempering and give everything a good mix. (Photos 30 and 31)
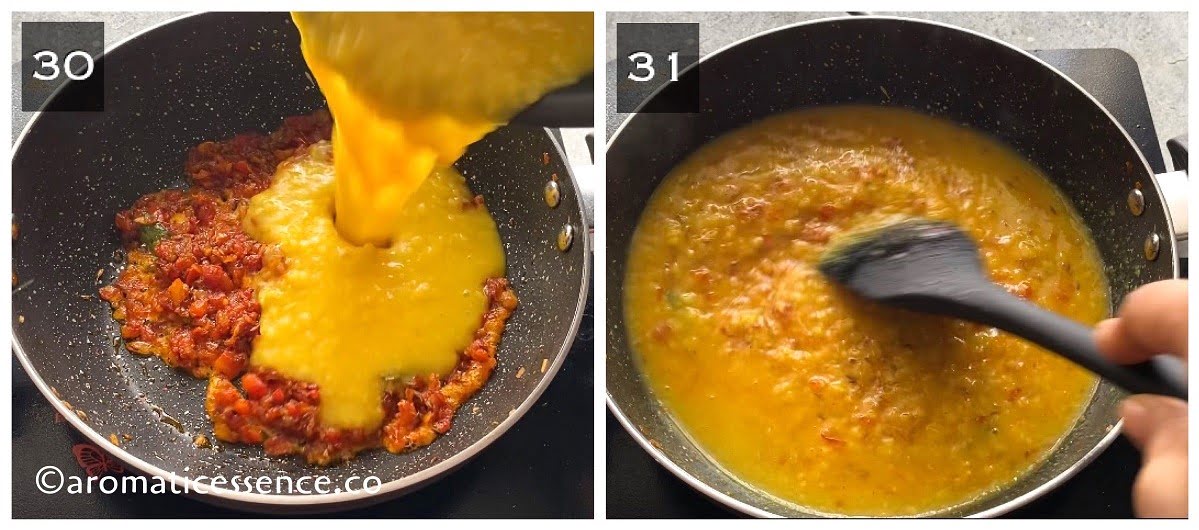
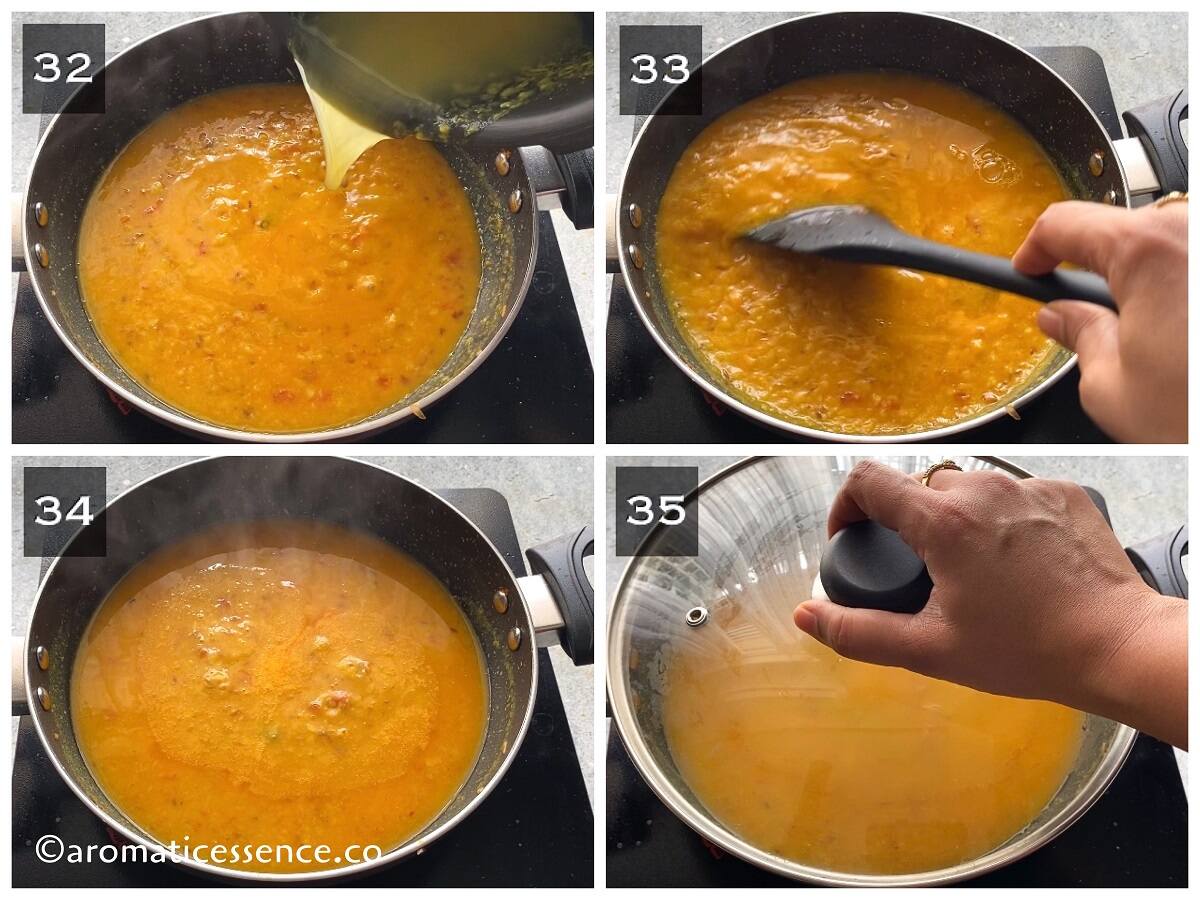
Add about 1/2 cup of water or as per desired consistency (I rinsed the cooker with 1/2 cups water). Bring it to a boil. Check for seasonings and adjust accordingly. (Photos 32 to 34)
Reduce the heat to low, cover the kadai and simmer for another 5 minutes. (Photos 35)
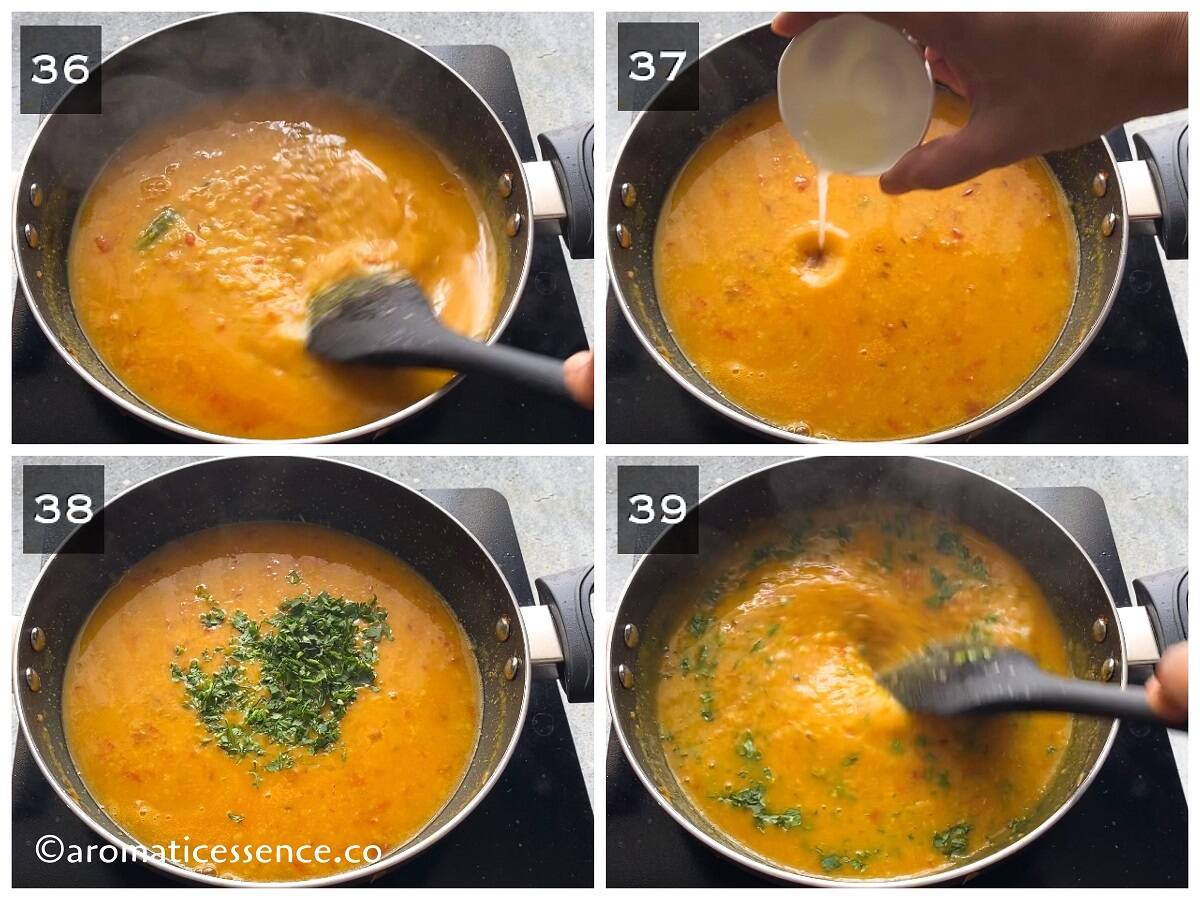
Open the lid and give the dal a good mix. (Photo 36)
Switch off the heat. Add 1/2 tablespoon lemon juice and 2 tablespoons finely chopped coriander leaves, mix well. (Photos 37 to 39)
Step 5: Second tempering (optional but recommended)
Heat 1 tablespoon ghee and 1/2 tablespoon oil in a tadka pan or a small pan over medium-low heat. (Photos 40 to 41)
Add 1/2 teaspoon cumin seeds and allow them to crackle. Next, add about 2 teaspoons of sliced garlic, and 1 dried red chili. (Photo 42)
Once the garlic starts to turn golden and the red chilies change color, add 1/8 teaspoon hing. Switch off the heat and add 1/4 teaspoon Kashmiri red chili powder. (Photos 43 to 45)

Mix well and pour it over the dal immediately. Mix it well and serve hot with rice or any other flatbread.

Instant Pot Instructions
Follow the same process above for rinsing and soaking the yellow lentils. If you skip soaking, refer to the pressure cooking time mentioned below.
Step 1: Saute aromatics, tomatoes, and spices
Press the ‘SAUTE’ button, and set it to ‘NORMAL’. Once it displays, ‘HOT’, add 1 tablespoon of ghee. Add 1/2 teaspoon cumin seeds. (Photo 46)
Wait for the cumin seeds to crackle, add 1/2 tablespoon minced ginger, 1 tablespoon minced garlic, and 2 slit green chilies. Saute until ginger, garlic turn aromatic. (Photos 47 & 48)
Add 1/2 cup chopped onions, saute until golden brown. (Photos 49 and 50)

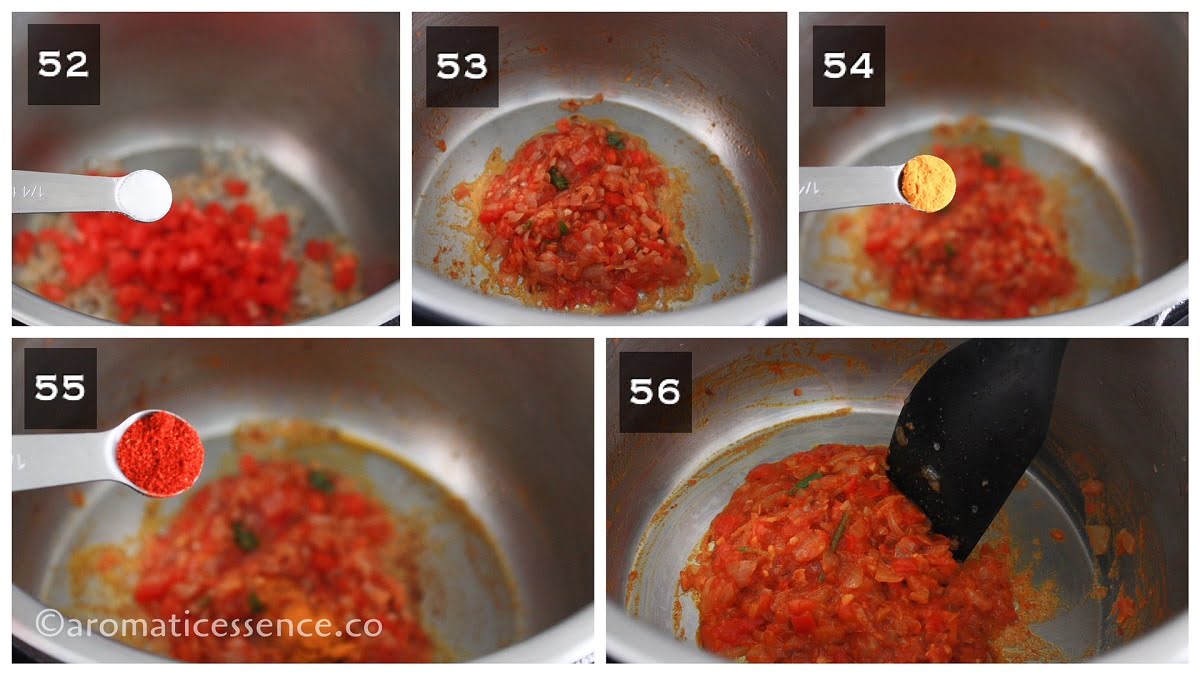
Add 1/2 cup chopped tomatoes and 1/4 teaspoon salt, sauté until it turns mushy. (Photos 51 to 53)
Add 1/4 teaspoon turmeric and 1/2 teaspoon red chilli powder, sauté for another 30 seconds. (Photos 54 to 56)
Step 2: Add dal, water, and pressure cook
Add the drained yellow lentils, mix well with the onion-tomato masala. Add 1 & 1/2 cups of water and mix well. (Photos 57 to 59)
Press ‘CANCEL’ to switch off the “SAUTE’ mode. Close the lid of the Instant Pot. Set the valve to ‘SEALING’.
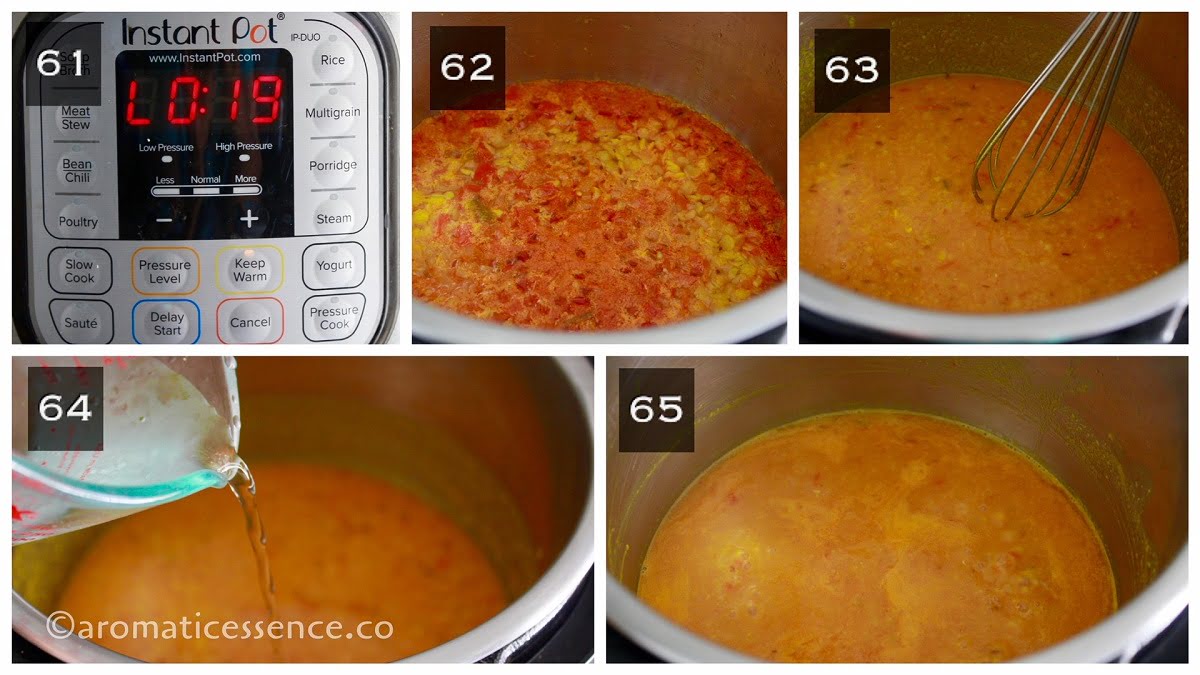
Pressure cook on ‘HIGH’ for 5 minutes. It will take some time for the pressure to build up (about 10 minutes), after which the timer will begin. (Photo 60)
For unsoaked toor dal, pressure cook on ‘HIGH’ for 8 to 10 minutes.

Step 3: Natural pressure release followed by adding the rest of the ingredients
Once the cooking cycle is complete, let the pot depressurize naturally. It took me about 19 minutes. You could let it depressurize for at least 10 minutes. (Photo 61)
Once the silver pin drops, turn the knob to ‘VENTING’ and open the lid away from you. (Photo 62)
Whisk the dal using a wired whisk or a spatula until it is smooth. You may leave it as it is if you prefer it that way. (Photo 63)
Turn on the ‘SAUTE’ mode, add about 1/2 cup of water or as per desired consistency, mix well and cook for another 5 minutes, stirring occasionally. Check for seasonings and adjust accordingly. (Photos 64 to 65)
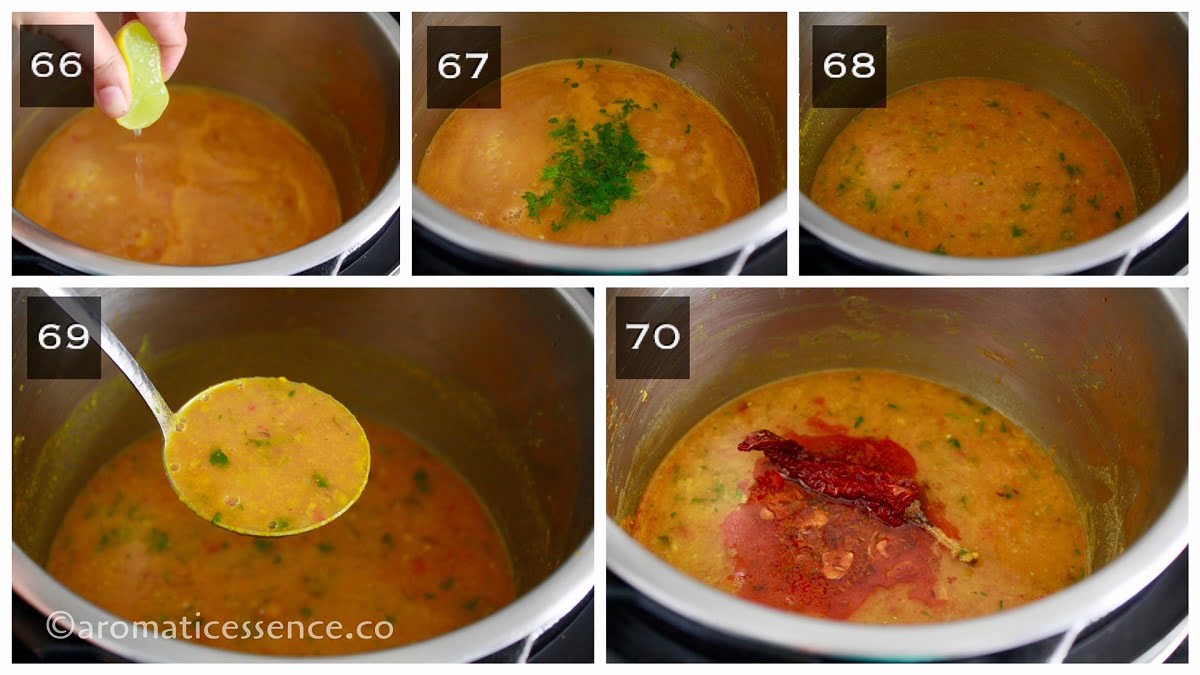
Switch off the IP. Squeeze lemon juice and finely chopped coriander leaves, mix well. (Photos 66 to 69)
Pour the second tempering over the dal. Mix well and serve hot. (Photo70)
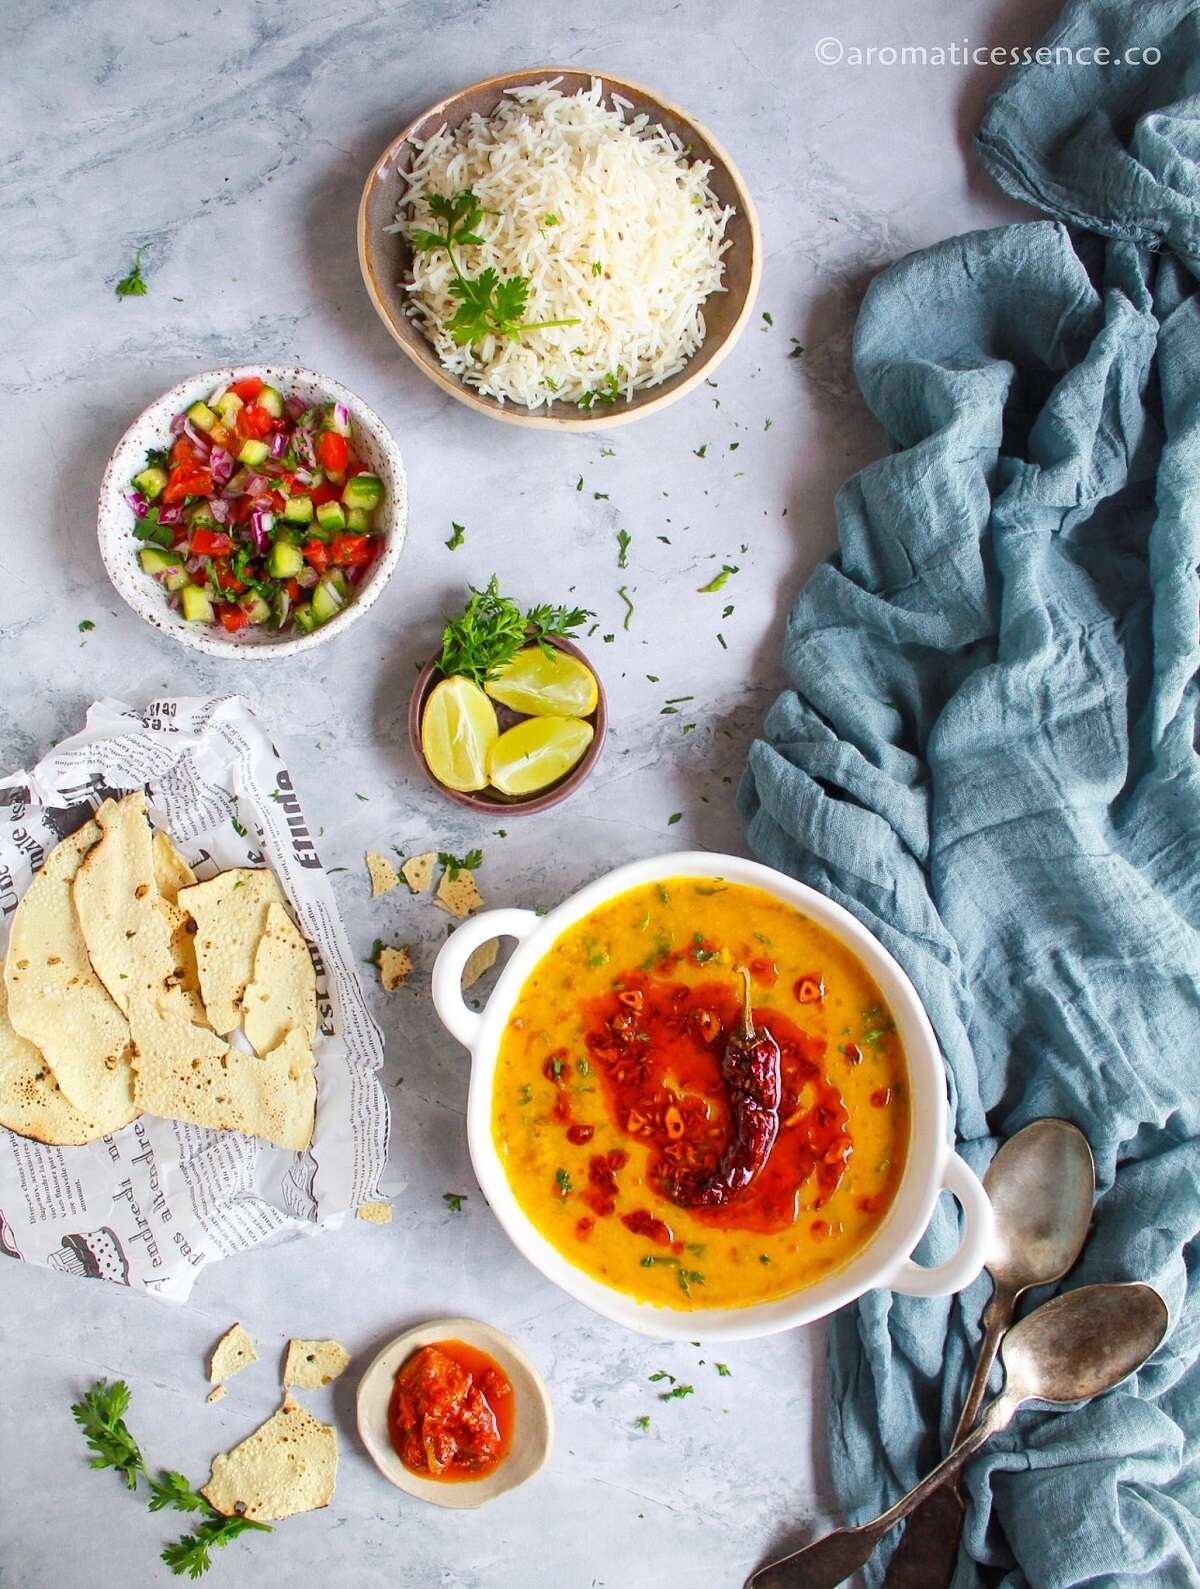
Serving suggestions
Pair this toor dal with;
- Plain steamed rice, pulao, or jeera rice.
- Sabzi like bhindi masala, bharli vangi, or aloo methi.
- Phulka, roti, puri, paratha, or any other type of flatbread.
Storage suggestions
Plain dal (without 1st and 2nd tempering): You can store the plain pressure cooked dal (step 2) in an air-tight container in the fridge for up to 2 to 3 days. You can also portion the cooked dal in freezer-safe bags, and freeze it for up to 2 months. Thaw overnight in the fridge. Follow the recipe from step 3.
Leftovers: Dal is best enjoyed the day it is made. However, if you have leftovers, you can refrigerate in an airtight container for up to 2 to 3 days. Make sure that you refrigerate leftover dal within two hours of its preparation.
Freeze: You can also freeze dal (skip the second tempering) in freezer-safe bags or containers for up to 2 months, though 1 month would be best for optimal flavor.
Thaw: Let it thaw overnight in the fridge. Transfer to a pot, reheat on the stovetop, stirring occasionally until heated through. Add a splash of water if needed to adjust the consistency. Add the tempering and enjoy!
Tips to make the best toor dal recipe
This recipe is one of the simplest recipes from Indian cuisine, and yet there are some tips I’d like to share with you.
- Ghee: Adds a ton of flavor and aroma to dal. Besides that, ghee is a much healthier cooking fat as compared to refined oils that are available these days. Please do not substitute this unless you follow a vegan diet.
- Consistency of dal: This depends on your preference and can be adjusted using more or less water. With the quantities mentioned in the recipe, you should end up with a semi-thick dal, which is how we prefer at home. It might look runny while it’s on the stovetop. But it will thicken after resting for 15-20 minutes.
- Heat: Since I have used the spicy variety of green chilies and hot chili powder, this dal is a bit spicy. On a scale of 1 to 5, it would be about 3 in terms of spiciness. You can skip the green chilies and the chili powder (or decrease the quantity) to make it less spicy.
Variations
The recipe that I have shared is a very basic dal recipe but it is delicious nonetheless. I do not like to add a lot of spices to this dal when making it for a regular meal. However, there are umpteen versions as each person has their own style of making dal. Here are some optional add-ins and alternatives.
- Garam masala: You can add whole spices such as cloves, cinnamon, and bay leaves in the first tempering and/or add about 1/4 teaspoon of garam masala along with the other spices.
- More spices and herbs: You can also add 1 teaspoon of coriander powder, 1/2 teaspoon of amchur powder (skip the lemon juice if adding this) along with other spices. Even 1 teaspoon of crushed kasoori methi can be added towards the end.
- Curry leaves: You can also add curry leaves to the tempering.
- Mustard seeds: You can add about 1/2 teaspoon of mustard seeds along with cumin seeds.
- Sweet and tangy dal: You can add little jaggery and tamarind extract or amchur (dry mango powder) to add some sweetness and tang respectively to the dal.
- No tomatoes: The recipe works perfectly fine without tomatoes. Skip it if you wish to.
- Green leafy veggies: You can include greens like spinach, fenugreek, moringa, kale, etc in the dal. Add them after sautéing the onion, tomato, and spices, and cook until they wilt.

Frequently asked questions (FAQs)
What is oily toor dal?
Oily toor dal is nothing but regular toor dal coated with edible oil to extend its shelf life. It is ideal to buy this dal if you stock up your pantry for months. Otherwise, you can opt for the regular dal which is what I always do.
Do you need to soak toor dal?
While you can get away by not soaking toor dal, I highly suggest you do. At least 30 minutes is ideal. Even it is for 15 minutes, it should be fine. You will need about 10-15 minutes to prep the onions, tomatoes, ginger, and garlic anyway. You can always soak the dal during this prep time.
Soaking lentils not only helps in reducing digestive problems but also reduces the cooking time. Needless to say, it does not make a huge difference in cooking time if you use a pressure cooker (stovetop or electric), but if you ask me I will still recommend soaking them.
Is toor dal and urad dal the same?
The two are not the same. Toor dal are pigeon peas or yellow lentils and urad dal is black lentils or black gram. Split and skinned urad dal, split with the skin (chilkewali urad dal or urad dal chilka), and whole urad dal are commercially available.
You may also enjoy these dal recipes
Instant pot brown lentil curry
★ Did you enjoy this simple toor dal recipe? If you try it out, I would love to hear from you! I’d appreciate it if you could rate and leave a review below in the comments. Your reviews help others know the recipe better too. Thanks so much 🙂
You can also follow me on Facebook, Pinterest, Instagram & Twitter

Toor Dal Recipe | Arhar Dal {Stovetop + Instant Pot}
Equipment
- Instant Pot DUO60 6 Qt 7-in-1
Ingredients
To cook the dal
- 1/2 cup toor dal 100 g
- 1 & 1/2 cups water
- 1/2 teaspoon salt
- 1/4 teaspoon turmeric
- 1/2 teaspoon oil
1st tempering
- 1 tablespoon ghee
- 1/2 teaspoon cumin seeds
- 1/2 tablespoon minced ginger
- 1 tablespoon minced garlic
- 2 green chilies slit lengthwise or chopped finely
- 1/2 cup finely diced onion
- 1/2 cup chopped tomatoes
- 1/4 teaspoon salt or to taste
- 1/4 teaspoon ground turmeric
- 1/2 teaspoon red chili powder or cayenne pepper, skip or adjust as per desired heat
- 1/2 cup hot water
- 2 tablespoons finely chopped coriander leaves
- 1/2 tablespoon lemon juice or as needed
2nd tempering (optional)
- 1 tablespoon ghee
- 1/2 tablespoon oil
- 1/2 teaspoon cumin seeds
- 2 garlic cloves sliced thinly
- 1 dried red chili
- 1/8 teaspoon hing
- 1/4 teaspoon Kashmiri red chili powder
Instructions
Stovetop Instructions
- Rinse the toor dal well under running water until the water runs clear, then soak in about 2 cups of water for about 30 minutes.
- Transfer the drained dal to a pressure cooker. Add water, salt, turmeric, and oil.
- Pressure cook the dal, for 3 whistles on high heat, then lower the heat and simmer for another 5minutes. Switch off the heat and set the cooker aside.
- Once the cooker depressurizes, open the lid and whisk the dal using a wired whisk or a spatula until it is smooth. You may leave it as it is if you prefer it that way.
- Heat ghee in a heavy-bottomed kadai or pot.
- Once hot enough, Add cumin seeds. Once the cumin seeds crackle, add minced ginger, garlic, and 2 slit green chilies. Saute until ginger, garlic turn aromatic.
- Add finely chopped onions, sauté until it turns golden brown.
- Next, add chopped tomatoes and salt, sauté until it turns mushy.
- Add turmeric and red chilli powder, sauté for another 30 seconds.
- Next, add the cooked dal to the prepared tempering and give everything a good mix.
- Add about 1/2 cup of water or as per desired consistency (I rinsed the cooker with 1/2 cup water), bring to a boil. Check for seasonings and adjust accordingly.
- Reduce the heat to low, cover the kadai and simmer for another 5 minutes.
- Open the lid and give the dal a good mix. Switch off the heat. Squeeze lemon juice and finely chopped coriander leaves, mix well.
- For the second tempering: Heat ghee and oil in a tadka pan or a small pan over medium-low heat. Add cumin seeds, allow it to crackle.
- Next, add sliced garlic, and 1 dried red chili.
- Once the garlic starts to turn golden and the red chilies change color, add hing. Switch off the heat and add Kashmiri red chili powder.
- Mix well and pour it over the dal immediately. Mix it well and serve hot with rice or any other flatbread.
Instant Pot Instructions
- Follow the same process above for rinsing and soaking the yellow lentils. If you skip soaking, refer to the pressure cooking time mentioned below.
- Press the 'SAUTE' button, and set it to 'NORMAL'. Once it displays, 'HOT', add ghee.
- Add cumin seeds. Once the cumin seeds crackle, minced ginger, minced garlic, and 2 slit green chilies. Saute until ginger, garlic turn aromatic.
- Add chopped onions, saute until golden brown.
- Add chopped tomatoes and salt, sauté until it turns mushy and you see oil oozing from the sides of the pot.
- Add turmeric and red chilli powder, sauté for another 30 seconds.
- Add the drained yellow lentils, mix well with the onion-tomato masala Add 1 & 1/2 cups of water. Mix well.
- Press 'CANCEL' to switch off the "SAUTE' mode. Close the lid of the Instant Pot. Set the valve to 'SEALING'.
- Pressure cook on high for 5 minutes. It will take some time for the pressure to build up (about minutes), after which the timer will begin.
- For unsoaked toor dal, pressure cook on 'HIGH' for 8 to 10 minutes.
- Step 3: Natural pressure release followed by adding the rest of the ingredients
- Once the cooking cycle is complete, let the pot depressurize naturally. It took me about 19 minutes. You could let it depressurize for at least 10 minutes.
- Once the silver pin drops, turn the knob to 'VENTING' and open the lid away from you.
- Whisk the dal using a wired whisk or a spatula until it is smooth. You may leave it as it is if you prefer it that way.
- Turn on the 'SAUTE' mode, add about 1/2 cup of water or as per desired consistency, mix well and cook for another 5 minutes, stirring occasionally. Check for seasonings and adjust accordingly.
- Switch off the IP. Squeeze lemon juice and finely chopped coriander leaves, mix well.
- Pour the second tempering over the dal. Mix well and serve hot.
Video
Notes
Nutrition
This dal is always a hit. I always get requests to make this
Hi Jagesha! Glad to hear that a simple dish like this is appreciated 🙂
Loved it, Thank you for all the information, details and options.
I simmered the dal in saucepan, all came out well.
Glad you enjoyed it, Thiery! Thanks for sharing your feedback 😊